hadoop集群搭建
hadoop集群搭建
1.安装配置Linux操作系统
01 建立master虚拟机(NameNode)
02 配置环境
001)设置主机名
002)配置网络
003)Xshell 与 Xftp
004)Java环境配置
005)关闭防火墙
03 克隆虚拟机
001)配置主机名、网络
002)配置主机映射(三台主机均要配置)
003)配置ssh免密登录
2.配置Hadoop集群
01 master节点操作
001)解压hadoop jar包
002)修改slaves配置文件
003)修改hadoop-env.sh配置文件
004)修改 core-site.xml配置文件
005)修改hdfs-site.xml配置文件
006)修改yarn-site.xml配置文件
007)修改mapred-site.xml配置文件
02 将hadoop的安装目录拷贝到其他子节点
03 启动hadoop
TOC
hadoop集群搭建
1.安装配置Linux操作系统
采用软件、工具:VMware workstation、CentosOS6.5
新建虚拟机—>自定义安装
01 建立master虚拟机(NameNode)
虚拟机命名为master(在VMware中的命名)
02 配置环境
001)设置主机名
[root@node01 ~]# vi /etc/sysconfig/networkNETWORKING=yesHOSTNAME=master #修改该属性为masterGATEWAY=192.168.153.2~
重启后生效
002)配置网络
1).修改ifcfg-eth0
[root@master ~]# cd /etc/sysconfig/network-scripts/[root@master network-scripts]# lltotal 204-rw-r--r--. 1 root root 171 Jul 28 16:42 ifcfg-eth0-rw-r--r--. 1 root root 254 Oct 10 2013 ifcfg-lolrwxrwxrwx. 1 root root 20 Jul 28 06:54 ifdown -> ../../../sbin/ifdown-rwxr-xr-x. 1 root root 627 Oct 10 2013 ifdown-bnep-rwxr-xr-x. 1 root root 5430 Oct 10 2013 ifdown-eth-rwxr-xr-x. 1 root root 781 Oct 10 2013 ifdown-ippp-rwxr-xr-x. 1 root root 4168 Oct 10 2013 ifdown-ipv6lrwxrwxrwx. 1 root root 11 Jul 28 06:54 ifdown-isdn -> ifdown-ippp-rwxr-xr-x. 1 root root 1481 Oct 10 2013 ifdown-post-rwxr-xr-x. 1 root root 1064 Oct 10 2013 ifdown-ppp-rwxr-xr-x. 1 root root 835 Oct 10 2013 ifdown-routes-rwxr-xr-x. 1 root root 1465 Oct 10 2013 ifdown-sit-rwxr-xr-x. 1 root root 1434 Oct 10 2013 ifdown-tunnellrwxrwxrwx. 1 root root 18 Jul 28 06:54 ifup -> ../../../sbin/ifup-rwxr-xr-x. 1 root root 12444 Oct 10 2013 ifup-aliases-rwxr-xr-x. 1 root root 859 Oct 10 2013 ifup-bnep-rwxr-xr-x. 1 root root 10556 Oct 10 2013 ifup-eth-rwxr-xr-x. 1 root root 11971 Oct 10 2013 ifup-ippp-rwxr-xr-x. 1 root root 10490 Oct 10 2013 ifup-ipv6lrwxrwxrwx. 1 root root 9 Jul 28 06:54 ifup-isdn -> ifup-ippp-rwxr-xr-x. 1 root root 727 Oct 10 2013 ifup-plip-rwxr-xr-x. 1 root root 954 Oct 10 2013 ifup-plusb-rwxr-xr-x. 1 root root 2364 Oct 10 2013 ifup-post-rwxr-xr-x. 1 root root 4154 Oct 10 2013 ifup-ppp-rwxr-xr-x. 1 root root 1925 Oct 10 2013 ifup-routes-rwxr-xr-x. 1 root root 3289 Oct 10 2013 ifup-sit-rwxr-xr-x. 1 root root 2488 Oct 10 2013 ifup-tunnel-rwxr-xr-x. 1 root root 3770 Oct 10 2013 ifup-wireless-rwxr-xr-x. 1 root root 4623 Oct 10 2013 init.ipv6-global-rwxr-xr-x. 1 root root 1125 Oct 10 2013 net.hotplug-rw-r--r--. 1 root root 13386 Oct 10 2013 network-functions-rw-r--r--. 1 root root 29853 Oct 10 2013 network-functions-ipv6//已经配置好的示例[root@master network-scripts]# vi ifcfg-eth0DEVICE=eth0 #默认第一块网卡TYPE=EthernetONBOOT=yes #改为yesNM_CONTROLLED=yesBOOTPROTO=static #改为static 手动分配IPIPADDR=192.168.153.4 #IPNETMASK=255.255.255.0 #子网掩码GATEWAY:192.168.153.2 #网关DNS1:114.114.114.114DNS2:8.8.8.8
2).删除配置文件 —> 70-persistent-net.rules
[root@master ~]# cd /etc/udev/rules.d/[root@master rules.d]# lltotal 16-rw-r--r--. 1 root root 316 Nov 22 2013 60-raw.rules-rw-r--r--. 1 root root 789 Jul 28 06:58 70-persistent-cd.rules-rw-r--r--. 1 root root 422 Jul 28 16:43 70-persistent-net.rules-rw-r--r--. 1 root root 54 Dec 8 2011 99-fuse.rules[root@master rules.d]# rm -f 70-persistent-net.rules
3).重启
[root@master ~]# reboot
4).重启完成后使用ifconfig命令查看配置是否生效
5).ping www.baidu.com 测试网络连通性
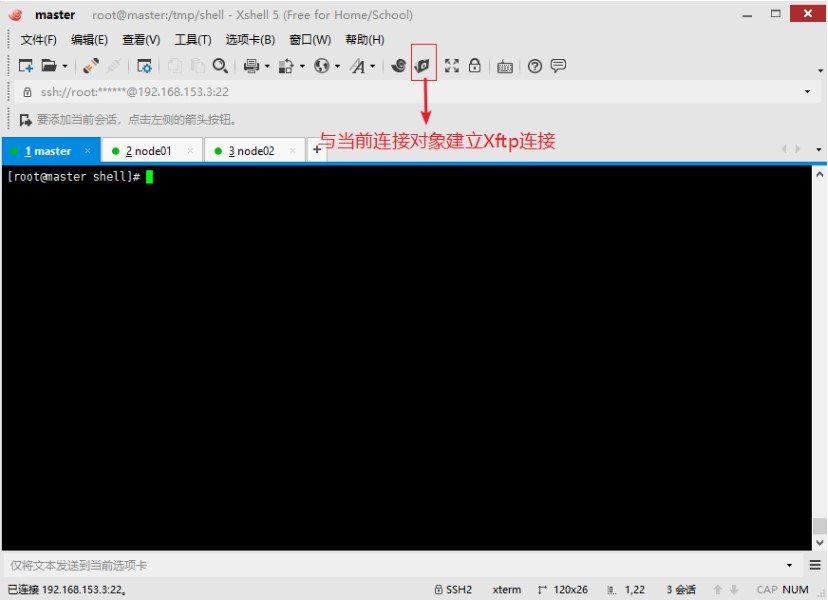
003)Xshell 与 Xftp
安装xshell和xftp,并与master建立连接
连接命令:
[c:\~]$ ssh root@192.168.153.3
创建文件夹
[root@master ~]# mkdir /usr/local/soft# 后续的软件在这个文件夹下安装
通过Xftp传递文件
将下载好的jdk发送到传输到soft下
004)Java环境配置
- 解压jdk
[root@master soft]# tar -zxvf jdk-8u221-linux-x64.tar.gz
- 配置环境变量
解压完成后使用ll命令查看解压出的文件夹[root@master soft]# lltotal 190532drwxr-xr-x. 7 uucp 143 4096 Jul 4 19:37 jdk1.8.0_221-rw-r--r--. 1 root root 195094741 Jul 31 07:12 jdk-8u221-linux-x64.tar.gz**jdk1.8.0\_221** 记住这个文件夹的名称配置profile文件export JAVA\_HOME=/usr/local/soft/jdk1.8.0\_221export PATH=.:JAVAHOME/bin:PATH[root@master soft]# vi /etc/profile# /etc/profile# System wide environment and startup programs, for login setup# Functions and aliases go in /etc/bashrc# 添加如下两条语句export JAVA_HOME=/usr/local/soft/jdk1.8.0_221export PATH=.:$JAVA_HOME/bin:$PATH# It's NOT a good idea to change this file unless you know what you# are doing. It's much better to create a custom.sh shell script in# /etc/profile.d/ to make custom changes to your environment, as this# will prevent the need for merging in future updates.pathmunge () {case ":${PATH}:" in*:"$1":*);;*)if [ "$2" = "after" ] ; thenPATH=$PATH:$1elsePATH=$1:$PATHfiesac}"/etc/profile" 79L, 1876C保存并退出,应用该文件[root@master soft]# source /etc/profile执行java -version检查是否配置成功[root@masters soft]# java -version #出现如下结果,配置成功java version "1.8.0_221"Java(TM) SE Runtime Environment (build 1.8.0_221-b11)Java HotSpot(TM) 64-Bit Server VM (build 25.221-b11, mixed mode)
005)关闭防火墙
关闭防火墙
service iptables stop
关闭防火墙自启动
chkconfig iptables off
03 克隆虚拟机
克隆已配置好的虚拟机,并分别命令为node01 node02
001)配置主机名、网络
对克隆的虚拟机进行主机名、网络的设置,具体见1 -> 01 ->001、002
002)配置主机映射(三台主机均要配置)
[root@node01 ~]# vi /etc/hosts127.0.0.1 localhost localhost.localdomain localhost4 localhost4.localdomain4::1 localhost localhost.localdomain localhost6 localhost6.localdomain6192.168.153.3 master192.168.153.4 node01192.168.153.5 node02
003)配置ssh免密登录
master执行命令ssh-keygen -t rsa 产生密钥 一直回车
执行命令
将密钥拷贝到其他两个子节点,命令如下:
ssh-copy-id -i node1
ssh-copy-id -i node2
实现免密码登录到子节点。
2.配置Hadoop集群
01 master节点操作
001)解压hadoop jar包
通过Xftp将下载好的jar包传输到/usr/local/soft下
解压jar包
[root@master soft]# tar -zxvf hadoop-2.6.0.tar.gz
002)修改slaves配置文件
修改master中hadoop的一个配置文件/usr/local/soft/etc/hadoop/slaves
删除原来的所有内容,修改为如下
node1
node2
[root@master hadoop]# vi slavesnode01node02~
003)修改hadoop-env.sh配置文件
加入
export JAVA_HOME=/usr/local/soft/jdk1.8.0_221
export JAVA_HOME=${JAVA_HOME}
两行
[root@master hadoop]# vi hadoop-env.sh# Licensed to the Apache Software Foundation (ASF) under one# or more contributor license agreements. See the NOTICE file# distributed with this work for additional information# regarding copyright ownership. The ASF licenses this file# to you under the Apache License, Version 2.0 (the# "License"); you may not use this file except in compliance# with the License. You may obtain a copy of the License at## http://www.apache.org/licenses/LICENSE-2.0## Unless required by applicable law or agreed to in writing, software# distributed under the License is distributed on an "AS IS" BASIS,# WITHOUT WARRANTIES OR CONDITIONS OF ANY KIND, either express or implied.# See the License for the specific language governing permissions and# limitations under the License.# Set Hadoop-specific environment variables here.# The only required environment variable is JAVA_HOME. All others are# optional. When running a distributed configuration it is best to# set JAVA_HOME in this file, so that it is correctly defined on# remote nodes.# The java implementation to use.export JAVA_HOME=/usr/local/soft/jdk1.8.0_221export JAVA_HOME=${JAVA_HOME}# protocol. Jsvc is not required if SASL is configured for authentication of# data transfer protocol using non-privileged ports.export HADOOP_CONF_DIR=${HADOOP_CONF_DIR:-"/etc/hadoop"}# Extra Java CLASSPATH elements. Automatically insert capacity-scheduler.for f in $HADOOP_HOME/contrib/capacity-scheduler/*.jar; doif [ "$HADOOP_CLASSPATH" ]; thenexport HADOOP_CLASSPATH=$HADOOP_CLASSPATH:$felseexport HADOOP_CLASSPATH=$ffidone# The maximum amount of heap to use, in MB. Default is 1000.#export HADOOP_HEAPSIZE=#export HADOOP_NAMENODE_INIT_HEAPSIZE=""# Extra Java runtime options. Empty by default.export HADOOP_OPTS="$HADOOP_OPTS -Djava.net.preferIPv4Stack=true"# Command specific options appended to HADOOP_OPTS when specifiedexport HADOOP_DATANODE_OPTS="-Dhadoop.security.logger=ERROR,RFAS $HADOOP_DATANODE_OPTS"# Licensed to the Apache Software Foundation (ASF) under one# or more contributor license agreements. See the NOTICE file# distributed with this work for additional information# regarding copyright ownership. The ASF licenses this file# to you under the Apache License, Version 2.0 (the# "License"); you may not use this file except in compliance# with the License. You may obtain a copy of the License at## http://www.apache.org/licenses/LICENSE-2.0## Unless required by applicable law or agreed to in writing, software# distributed under the License is distributed on an "AS IS" BASIS,# WITHOUT WARRANTIES OR CONDITIONS OF ANY KIND, either express or implied.# See the License for the specific language governing permissions and# limitations under the License.# Set Hadoop-specific environment variables here.# The only required environment variable is JAVA_HOME. All others are# optional. When running a distributed configuration it is best to# set JAVA_HOME in this file, so that it is correctly defined on# remote nodes.# The java implementation to use.export JAVA_HOME=/usr/local/soft/jdk1.8.0_221export JAVA_HOME=${JAVA_HOME}
004)修改 core-site.xml配置文件
将下面的配置参数加入进去修改成对应自己的
<configuration><property><name>fs.defaultFS</name><value>hdfs://master:9000</value></property><property><name>hadoop.tmp.dir</name><value>/usr/local/soft/hadoop-2.6.0/tmp</value></property><property><name>fs.trash.interval</name><value>1440</value></property></configuration>
005)修改hdfs-site.xml配置文件
将dfs.replication设置为1,添加如下配置
<configuration><property><name>dfs.replication</name><value>1</value></property><property><name>dfs.permissions</name><value>false</value></property></configuration>
006)修改yarn-site.xml配置文件
添加下列配置
<configuration><property><name>yarn.resourcemanager.hostname</name><value>master</value></property><property><name>yarn.nodemanager.aux-services</name><value>mapreduce_shuffle</value></property><property><name>yarn.log-aggregation-enable</name><value>true</value></property><property><name>yarn.log-aggregation.retain-seconds</name><value>604800</value></property></configuration>
007)修改mapred-site.xml配置文件
将mapred-site.xml.template 复制一份为 mapred-site.xml
命令:cp mapred-site.xml.template mapred-site.xml
添加如下配置
<configuration><property><name>mapreduce.framework.name</name><value>yarn</value></property><property><name>mapreduce.jobhistory.address</name><value>master:10020</value></property><property><name>mapreduce.jobhistory.webapp.address</name><value>master:19888</value></property></configuration>
02 将hadoop的安装目录拷贝到其他子节点
命令
scp -r /usr/local/soft/hadoop-2.6.0 node1:/usr/local/soft/scp -r /usr/local/soft/hadoop-2.6.0 node2:/usr/local/soft/
03 启动hadoop
首先看下hadoop-2.6.0目录下有没有tmp文件夹。
如果没有 执行一次格式化命令:
cd /usr/local/soft/hadoop-2.6.0目录下
执行命令:
./bin/hdfs namenode -format
会生成tmp文件。
然后
/usr/local/soft/hadoop-2.6.0目录下
启动执行:./sbin/start-all.sh
启动完成后验证进程
主节点进程:namenode secondarnamenode resourcemanager
[root@master hadoop]# jps1649 SecondaryNameNode1793 ResourceManager4211 Jps1479 NameNode
进入node01 node02执行该命令,观察是否有两个进程NodeManager DataNode
[root@node01 ~]# jps2244 Jps1608 NodeManager1501 DataNode
上述进程均存在则Hadoop启动成功
可以登录浏览器地址:192.168.1.80:50070(ip地址是master的地址)查看
#
来自为知笔记(Wiz)
#
转载于 //www.cnblogs.com/local-wzy/p/11279946.html


,PID三个变量的作用与关系")


还没有评论,来说两句吧...